Blog

“The David” – finishing the rib assembly

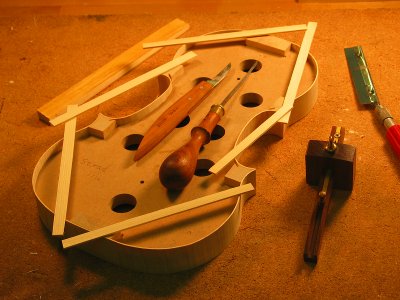
The next step with the rib assembly is to install the linings. The linings provide additional strength to the ribs and also provide a larger gluing surface for the top and back. When completed the rib assembly will be quite flexible yet amazingly strong.

To begin the process, I split pieces of straight-grained spruce and plane the pieces to a dimension of 2mm thick and 8mm wide. The lengths are left oversized. I also cut mortices into the blocks to accept the c-linings. The other linings will just have butt joints to the blocks.

Linings roughed-out
Linings roughed-out

The next step is to bend the linings and trim them to length. Bending is quite easily accomplished using a hot bending iron and a little steam. The shape must exactly fit the outline so that there is little to no tension introduced. The trimming to length has to be exact and is best approached slowly.

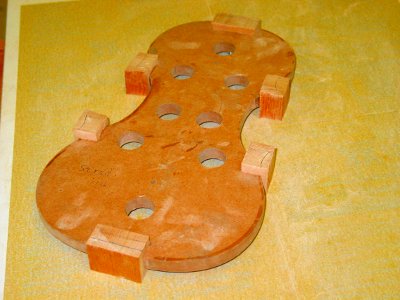
Linings bent and trimmed

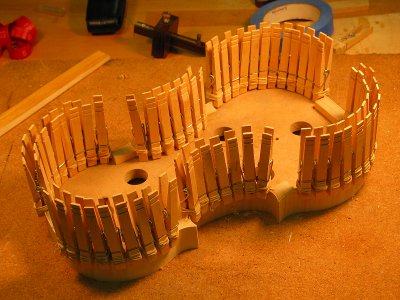
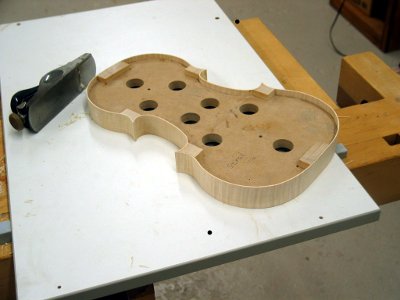
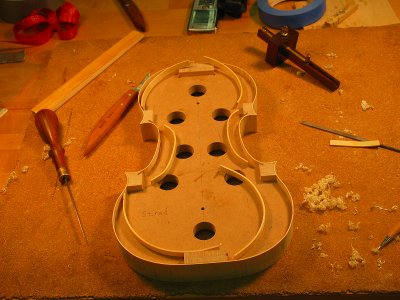
The linings are now glued into place. The ribs and linings are glue-sized and then glued into place. The clamps are just clothes-pins re-enforced with rubber bands. The linings are just slightly proud of the ribs. The whole assembly will be flattened on a shooting board.

Linings glued into place.

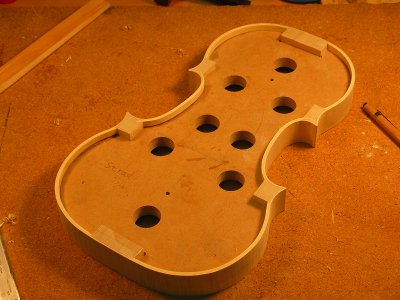
The finished rib assembly. Next we make the back.

Finished ribs assembly'

“The Lyric” – Gets a Bath

After developing a beautiful tan, it is time for “The Lyric” to get a bath. This is the aqueous phase of the ground preparation. The first step is to apply a coat of a 3% gelatin solution. I do this to seal the end-grain in order to prevent uneven absorption of the stain color. Next I apply a water based stain to the whole violin. This enhances the contrast between the winter and summer grain a gives the instrument a nice orange/cinnamon color. The result is:

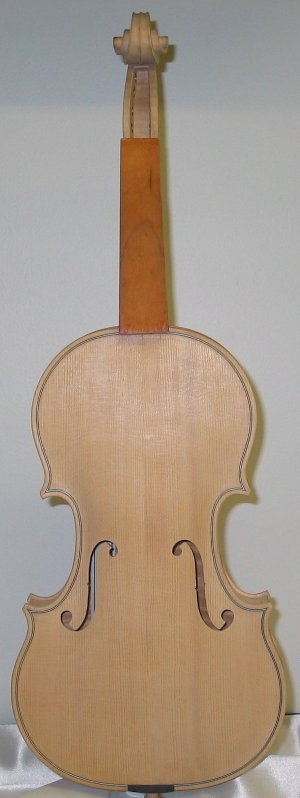
The Lyric with ground - side view
The Lyric with ground - back view

“The David” – starting a new violin

I recently received a commission for a new violin. This thread will document the process of making “The David”.

The customer requested a new violin made to my Strad pattern. Together, we went through my wood supply and picked out the wood for the instrument. The spruce is Italian  and the maple is Bosnian. Both pieces are over 10 years old. The blocks are some very straight grained Sitka spruce that I found in Canada.

The selected wood
The selected wood

The first step is to trim the blocks to size and spot glue them to the form.

The Blocks glued to the form

The next step is to draw the outline on the blocks.

Tracing the outline on the ribs
Blocks ready to be trimmed.

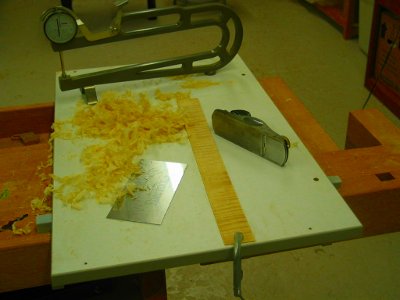
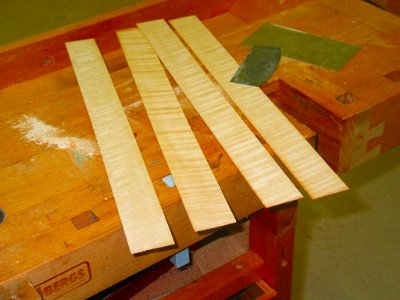
Next, we have to plane and scrape the rib material down to a thickness of about 1.2 mm.

Planning and scraping ribs
finished rib material

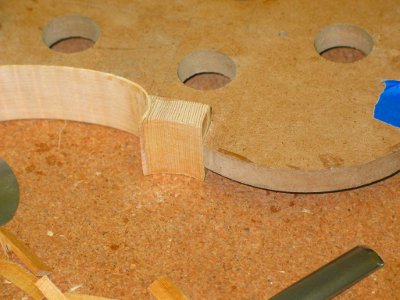
Finally, we then trim the blocks to accept c-bout ribs, bend the ribs to shape and glue them in place.

Finished c-bout ribs

Now we trim the other blocks to accept the bent ribs.

Trim the other blocks

Finally, the finished ribs.

The finished ribs
The finished ribs

“The Lyric” gets a new coat of paint

“The Lyric” was a great success. The tone is beautiful and it has great carrying power. In the hands of the owner, it is a truly wonderful sound to behold.  After much wrangling, I was able to get the instrument back for the varnish job.

The first step is to take the setup down, remove the finger board and glue on a temporary protective board. I then scraped the instrument and took one more pass on the edge work and the chamfer on the scroll. Here it is, ready for the varnish process.

Prepared for varnishing

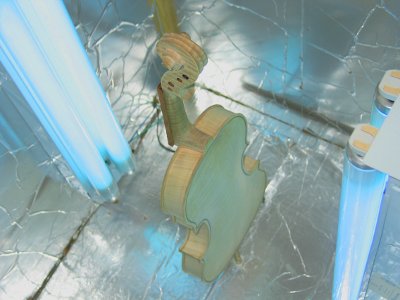
The next step in the process is to give the violin a nice suntan. I do this by placing the instrument in an ultra-violet light box and by exposing it to some morning sun. This step usually takes a week or more. Here is “The Lyric” in the light box.

"The lyric" in the light box

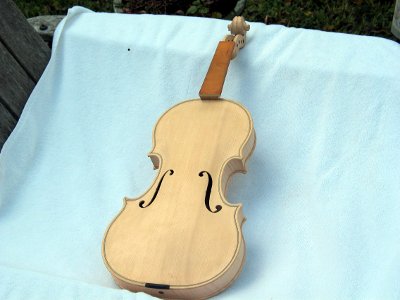
“The Lyric” gets a few rays of morning sun. Now she is ready for application of the ground.

"The Lyric" gets morning sun

Which Strings?

I often get asked what strings I recommend for violins and violas. Unfortunately the answer is, “It depends”. Most importantly it depends on your instrument. A warm sounding instrument might need brighter sounding strings in order to boost projection. Conversely, a bright sounding instrument might need to be warmed up a little.

The next thing to consider is what I will call your style of play. If you play and electric or amplified instrument, the strings really don’t matter. EQ has much more effect on your sound than strings ever will. I often suggest to my young or inexperienced players that they use steel-core strings. The main  reason is that with steel-core strings you can put fine tuners on all four strings and it makes tuning much easier (this also applys to players that have worn out or poorly adjusted pegs). Most other players should consider one of the synthetic core strings that are available.  Baroque and period players, however, like the sound and feel of gut strings

That said, I will give my impressions of strings I am familiar with.

Steel Core – My favorite steel core strings are Thomastik Spirocore. I think these give good tone (similar to Dominants) on a variety of instruments and are very stable.

Synthetic Core – Thomastik Dominants are a good all around choice for a wide range of instruments. I think these are the best price/performance strings available. My favorite strings for tone and projection are Pirastro Obligato with a gold E-string. These have a wonderful tone on most instruments, are well balanced and very stable. I generally don’t like the new Thomastik Visions. On most instruments that I have heard they just have too much scintillation (I can’t think of a better word). I have never seen and instrument that can handle Evah Pirazzi strings. The G and D can be good but the A is just awful. For viola I like (as well as most of my professional customers) Obligatos with a Larsen A. Larsen really nailed the viola A string.

Gut Core – I don’t have much experience with gut strings. For most instruments the synthetic core are superior performers. I do have experience with Oliv and Eudoxa. I may prefer the tone of Eudoxa on the instruments I have tried them on.

One final word for players who have really fine old instruments. Quite often theses instruments, due to crack repairs and sound post patches, have an unbalanced tone. This can usually be largely overcome by mixing and matching strings. This is a time consuming and expensive exercise but usually well worth it.
Workshop Layout

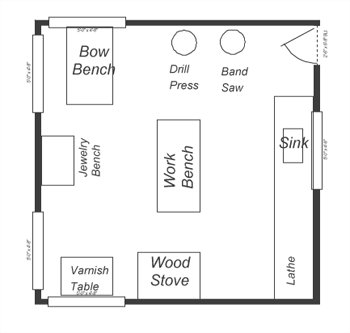
I am in the process of building a new shop. It is basically a square room with large windows all around . He is my first attempt at a layout.

Floor Plan

The windows on the left side are full length have a wonderful view out to the water. I have a jewelry bench for the metal work I have to do for bow making. Next to that is a bench for bow work.

In the middle is my main workbench. I haven’t decided whether to custom build one or buy a ready-built. I’d be interested in hearing what other makers are using for workbenches

My varnish table is in the southwest corner in front of full length windows. I thought this would give me maximum sun exposure for tanning instruments and curing varnishes. I also cure varnishes in a black-light box that will be integrated into the table. I would be interested in hearing what other makers use for curing varnishes and dust protection.

Finally, there is a long counter with a sink and plenty of cabinet storage under neath. I also thought I would mount my lathe/mill here.

 Please share your experiences in setting up a shop and answers to some of the other questions I posed above.

Hill Bows

I have quite a few Hill bows come across my workbench and I thought I would share some knowledge about identifying the dates and makers of Hill bows. This knowledge has been acquired from a number of sources including Lynn Hannings, A write-up (I don’t remember where I came across it) by Thomas E. Florence and the Hill Bows website.

It is not the case that the sticks and frogs were always made by the same maker. The sticks were made first and later matched with a frog as needed. So, to completely identify a Hill bow you need to look for 3 pieces of information. First, the date is stamped on the stick just ahead of the mortice (something like C 57 for 1957). there may also be a registration number stamped on a side facet. Second, The makers mark is stamped on the face of metal tip (all Hill bows I have seen have either a silver or gold tip). Finally, the makers mark for the frog is stamped on slide of the frog.

The makers names, dates and mark are as follows:

Sidney Yeoman 1885 single tick
William C. Retford 1891 single dot
William R. Retford 1919 two dots
William Johnston 1894 two ticks (vertical before 1904 horizonta; after)
Frank Napier 1904 three leaves
Charles Leggatt d.1917 two ticks in center
Arthur Copley 1917 number 1
Edgar Bishop 1917 number 2
Albert Leeson 1919 number 3
Leslie Bailey 1920 number 4
Arthur Barnes 1919 number 5
Arthur Bultitude 1922 number 6
William Watson 1945 number 7
Malcom Taylor 1947 number 8
Ronald Harding 1949 number 9
Arthur Brown 1946 letter x or number 10
Allen Willis 1940 number 11
Garner Wilson 1936 number 12
Arthur Scarbrow number 0
David Taylor number 13
John Clutterbuck number 14
Brian Alvey 1966 number 15
Stephen Bristow number 16
Ian Shepherd number 17
David Earl number 18
Matthew Coltman number 19
John Stagg number 20
Derek Wilson number 21
Timothy Baker number 22

If anyone has corrections or additions to this, please let me know.